-
×
 Flyers
- Finished Size:
8.5in x 11in
- Paper Weight:
80# Gloss Cover Paper - Heavy Flyer Weight
- Sides:
Double Sided
- Quantity:
30
- Printing Cost:
Qty: 1, Price: $21.80
- Cost Per Flyer:
$0.73
- Color:
Full Color
- Printing Time::
Two Business Days
- Folding:
None - Use Brochures form instead
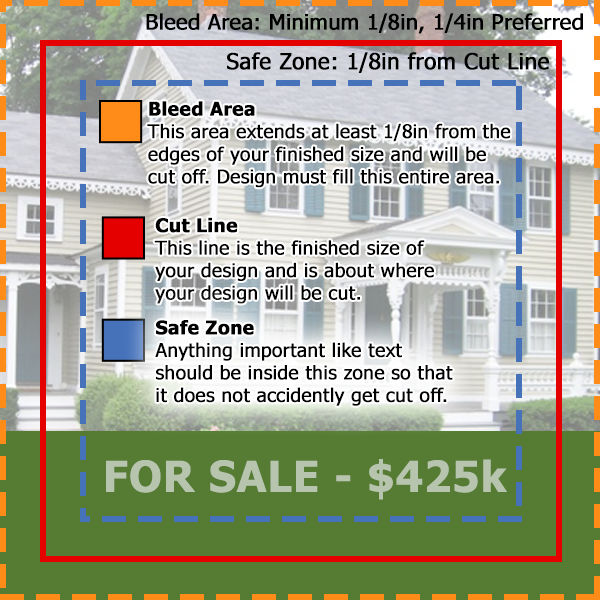
- Bleed:
Full Bleed (Print to Edge)
- Bleed Layout:
Full Bleed - Fix it for me.
- File Submission::
Instant Upload
- Double Sided Files:
- My front file also contains the back side. I don't need to upload a second file.
- Front File:
- Final Total:
$21.80
Subtotal: $21.80